# js与着色器的数据传输
- attribute
- gl.certexAttribute3f()的同族函数
- 鼠标在canvas中的css位置转weebgl坐标位
- uniform变量
- gl.unifrom4f()同族函数
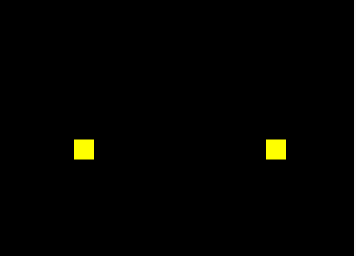
# 实例1 用js控制一个点的位置
# attribute 变量的概念。
回顾一下我们上一篇中点的定位:
gl_Position = vec4(0,0,0,1);
这是一种将数据写死了的硬编码,缺乏可扩展性。
我们要让这个点位可以动态改变,那就得把它变成attribute变量。
attribute 变量是只有顶点着色器才能使用它的。
js 可以通过attribute 变量向顶点着色器传递与顶点相关的数据。
# js向attribute 变量传参的步骤
- 在顶点着色器中声明attribute 变量。
<script id='vertexShader' type='x-shader/x-vertex'>
attribute vec4 a_Position;
void main(){
    gl_Position = a_Position;
    gl_PointSize = 50.0;
}
</script>
- 在js中获取attribute 变量
const a_Position = gl.getAttribLocation(gl.program,'a_Position');
- 修改attribute变量
gl.vertexAttrib3f(a_Position,0.0,0.5,0.0);
整体代码
<canvas id="canvas"></canvas>
<script id="vertexShader" type="x-shader/x-vertex">
    attribute vec4 a_Position;
    void main(){
        gl_Position = a_Position;
        gl_PointSize = 50.0;
    }
</script>
<script id="fragmentShader" type="x-shader/x-fragment">
    void main() {
        gl_FragColor = vec4(1.0, 1.0, 0.0, 1.0);
    }
</script>
<script type="module">
    import {initShaders} from '../jsm/Utils.js';

    const canvas = document.getElementById('canvas');
    canvas.width=window.innerWidth;
    canvas.height=window.innerHeight;
    const gl = canvas.getContext('webgl');
    const vsSource = document.getElementById('vertexShader').innerText;
    const fsSource = document.getElementById('fragmentShader').innerText;
    initShaders(gl, vsSource, fsSource);
    const a_Position=gl.getAttribLocation(gl.program,'a_Position');
    gl.vertexAttrib3f(a_Position,0.0,0.0,0.0);
    gl.clearColor(0.0, 0.0, 0.0, 1.0);
    gl.clear(gl.COLOR_BUFFER_BIT);
    gl.drawArrays(gl.POINTS, 0, 1);
</script>
# js向attribute 变量传参的原理
# 着色器中的attribute 变量
attribute vec4 a_Position;
void main(){
    gl_Position = a_Position;
    gl_PointSize = 50.0;
}
- attribute 是存储限定符,是专门用于向外部导出与点位相关的对象的,这类似于es6模板语法中export 。
- vec4 是变量类型,vec4是4维矢量对象。
- a_Position 是变量名,之后在js中会根据这个变量名导入变量。这个变量名是一个指针,指向实际数据的存储位置。也是说,我们如果在着色器外部改变了a_Position所指向的实际数据,那么在着色器中a_Position 所对应的数据也会修改。
接下来,咱们说一下在js 里如何获取attribute 变量。
# 在js中获取attribute 变量
在js 里不能直接写a_Position 来获取着色器中的变量。
因为着色器和js 是两个不同的语种,着色器无法通过window.a_Position 原理向全局暴露变量。
使用程序对象获取着色器暴漏的变量
const a_Position=gl.getAttribLocation(gl.program,'a_Position');
- gl 是webgl 的上下文对象。
- gl.getAttribLocation() 是获取着色器中attribute 变量的方法。
- getAttribLocation() 方法的参数中:
- gl.program 是初始化着色器时,在上下文对象上挂载的程序对象。
- 'a_Position' 是着色器暴露出的变量名。
gl 上下文对象对program 程序对象说,你去顶点着色器里找一个名叫'a_Position' 的attribute变量。
# 在js中修改attribute 变量
attribute 变量即使在js中获取了,他也是一个只会说GLSL ES语言的人,他不认识js 语言,所以我们不能用js 的语法来修改attribute 变量的值:
a_Position.a=1.0 //error
我们得用特定的方法改变a_Position的值:
gl.vertexAttrib3f(a_Position,0.0,0.5,0.0)
- gl.vertexAttrib3f() 是改变变量值的方法;
- 3f 三个浮点数
- gl.vertexAttrib3f() 方法参数
- a_Position 着色器变量
- 后面三个参数是顶点的x/y/z位置
a_Position被修改后,我们就可以使用上下文对象绘制最新的点位了。
gl.clearColor(0.0, 0.0, 0.0, 1.0);
gl.clear(gl.COLOR_BUFFER_BIT);
gl.drawArrays(gl.POINTS, 0, 1);
# 扩展
# vertexAttrib3f()的同族函数
gl.vertexAttrib3f(location,v0,v1,v2)方法是一个系列修改着色器中的attribute变量的方法之一,有许多同族方法;
gl.vertexAttrib1f(location,v0);
gl.vertexAttrib2f(location,v0,v1);
gl.vertexAttrib3f(location,v0,v1,v2);
gl.vertexAttrib4f(location,v0,v1,v2,v3);
可以改变attribute变量前的n个值;
vertexAttrib1f() 方法自定一个矢量对象的v0值,v1、v2 则默认为0.0,v3默认为1.0,其数值类型为float 浮点型。
# webgl 函数的命名规律
GLSL ES里函数的命名结构是:<基础函数名><参数个数><参数类型>
以vertexAttrib3f(location,v0,v1,v2,v3)为例;
- vertexAttrib:基础函数名:
- 3:参数个数,这里的参数个数是要传给变量的参数个数,而不是当前函数的参数个数
- f:参数类型,f 代表float浮点类型,除此之外还有i代表整型,v代表数字;
# 第二章 用鼠标控制点位
用鼠标控制一个点的位置,首先要知道鼠标点在webgl 坐标系中的位置,这样才能让一个点出现在我们鼠标点击的位置。
接下来咱们就说一下如何获取鼠标点在webgl 坐标系中的位置。
# 1-获取鼠标点在webgl 坐标系中的位置
对于鼠标点在webgl 坐标系中的位置,我们是无法直接获取的。所以我们得先获取鼠标在canvas 这个DOM元素中的位置。
canvas.addEventListener('click',function(event){
    const [clientX,clientY] = event;
    const [left,top] = canvas.getBoundingClientRect();
    const [cssX,cssY] = [clientX-left,clientY-top]
})
对于cssX,cssY 的获取,大家应该都不陌生,这在canvas 2d 也会用到。
我们可以用向量减法来求解。

已知:向量a(clientX,clientY),向量c(left,top)
求:向量c
解:
由向量的减法得:向量a减向量c,等于以向量b 的终点为起点,以向量a的终点为终点的向量c
将向量c 视之为坐标点c,那点c 就是鼠标在canvas 画布中的css 位。
所以:向量c=a-c=(clientX-left,clientY-top)
将向量c 视之为坐标点c,那点c 就是鼠标在canvas 画布中的css 位。
因为html 坐标系中的坐标原点和轴向与canvas 2d是一致的,所以在我们没有用css 改变画布大小,也没有对其坐标系做变换的情况下,鼠标点在canvas 画布中的css 位就是鼠标点在canvas 2d坐标系中的位置。
# canvas 坐标系转webgl 坐标系
1.解决坐标原点位置的差异。
const [halfWidth,halfHeight]=[width/2,height/2];
const [xBaseCenter,yBaseCenter]=[cssX-halfWidth,cssY-halfHeight];
上面的[halfWidth,halfHeight]是canvas 画布中心的位置。
[xBaseCenter,yBaseCenter] 是用鼠标位减去canvas 画布的中心位,得到的就是鼠标基于画布中心的位置。
2.解决y 方向的差异。
const yBaseCenterTop=-yBaseCenter;
因为webgl 里的y 轴和canvas 2d 里的y轴相反,所以咱们对yBaseCenter 值取一下反即可。
3.解决坐标基底的差异。
const [x,y]=[xBaseCenter/halfWidth,yBaseCenterTop/halfHeight]
由于canvas 2d 的坐标基底中的两个分量分别是一个像素的宽高,而webgl的坐标基底的两个分量是画布的宽高,所以咱们得求个比值。
整体代码:
canvas.addEventListener('click',function(event){
  const {clientX,clientY}=event;
  const {left,top,width,height}=canvas.getBoundingClientRect();
  const [cssX,cssY]=[
    clientX-left,
    clientY-top
  ];
  const [halfWidth,halfHeight]=[width/2,height/2];
  const [xBaseCenter,yBaseCenter]=[cssX-halfWidth,cssY-halfHeight];
  const yBaseCenterTop=-yBaseCenter;
  const [x,y]=[xBaseCenter/halfWidth,yBaseCenterTop/halfHeight];
})
关于获取鼠标点在webgl 坐标系中的位置的方法,我们就说到这,接下来咱们基于这个位置,修改着色器暴露出来的位置变量即可。
# 修改attribute 变量
- 获取attribute 变量
- 在获取鼠标在webgl 画布中的位置的时候,修改attribute 变量
- 清理画布
- 绘图
import {initShaders} from '../jsm/Utils.js';

const canvas = document.getElementById('canvas');
canvas.width=window.innerWidth;
canvas.height=window.innerHeight;
const gl = canvas.getContext('webgl');
const vsSource = document.getElementById('vertexShader').innerText;
const fsSource = document.getElementById('fragmentShader').innerText;
initShaders(gl, vsSource, fsSource);
const a_Position=gl.getAttribLocation(gl.program,'a_Position');
gl.clearColor(0.0, 0.0, 0.0, 1.0);
gl.clear(gl.COLOR_BUFFER_BIT);

canvas.addEventListener('click',function(event){
  const {clientX,clientY}=event;
  const {left,top,width,height}=canvas.getBoundingClientRect();
  const [cssX,cssY]=[
    clientX-left,
    clientY-top
  ];
  const [halfWidth,halfHeight]=[width/2,height/2];
  const [xBaseCenter,yBaseCenter]=[cssX-halfWidth,cssY-halfHeight];
  const yBaseCenterTop=-yBaseCenter;
  const [x,y]=[xBaseCenter/halfWidth,yBaseCenterTop/halfHeight];
  gl.vertexAttrib2f(a_Position,x,y);
  gl.clear(gl.COLOR_BUFFER_BIT);
  gl.drawArrays(gl.POINTS, 0, 1);
})
在上面的例子中,大家每点击一次canvas 画布,都会画出一个点,而上一次画的点就会消失,我们无法连续画出多个点。

# webgl 的同步绘图原理
具备canvas 2d可能会认为无法画出多点是gl.clear(gl.COLOR_BUFFER_BIT)清理画布导致,因为我们在用canvas 2d 做动画时,其中就有一个ctx.clearRect() 清理画布的方法。
那咱们将gl.clear() 方法注释掉试试。
# 用实践得真知
gl.vertexAttrib2f(a_Position,x,y);
//gl.clear(gl.COLOR_BUFFER_BIT);
gl.drawArrays(gl.POINTS, 0, 1);

gl.drawArrays(gl.POINTS, 0, 1) 方法和canvas 2d 里的ctx.draw() 方法是不一样的,ctx.draw() 真的像画画一样,一层一层的覆盖图像。
gl.drawArrays() 方法只会同步绘图,走完了js 主线程后,再次绘图时,就会从头再来。也就说,异步执行的drawArrays() 方法会把画布上的图像都刷掉。
比如
const a_Position=gl.getAttribLocation(gl.program,'a_Position');
gl.clearColor(0.0, 0.0, 0.0, 1.0);
gl.clear(gl.COLOR_BUFFER_BIT);
gl.vertexAttrib2f(a_Position,0.1,0);
gl.drawArrays(gl.POINTS, 0, 1);
gl.vertexAttrib2f(a_Position,-0.1,0);
gl.drawArrays(gl.POINTS, 0, 1);

一秒后,再画一个点。
const a_Position = gl.getAttribLocation(gl.program,'a_Position')
gl.clearColor(0.0,0.0,0.0,1.0)
gl.clear(gl.COLOR_BUFFER_BIT)
gl.vertexAttrib2f(a_Position,0.1,0);
gl.drawArrays(gl.POINTS, 0, 1);
gl.vertexAttrib2f(a_Position,-0.1,0);
gl.drawArrays(gl.POINTS, 0, 1);
setTimeout(()=>{
  gl.vertexAttrib2f(a_Position,0,0);
  gl.drawArrays(gl.POINTS, 0, 1);
},1000)
两个点、黑色背景消失。webgl 同步绘图原理。
使用存储器(数组)将点位存储
const a_Position=gl.getAttribLocation(gl.program,'a_Position');
gl.clearColor(0.0, 0.0, 0.0, 1.0);
gl.clear(gl.COLOR_BUFFER_BIT);
const g_points=[
  {x:0.1,y:0},
  {x:-0.1,y:0},
];
render();
setTimeout(()=>{
  g_points.push({x:0,y:0});
  render();
},1000)
function render(){
  gl.clear(gl.COLOR_BUFFER_BIT);
  g_points.forEach(({x,y})=>{
    gl.vertexAttrib2f(a_Position,x,y);
    gl.drawArrays(gl.POINTS, 0, 1);
  })
}

# 例子 鼠标绘制多个点
const a_Position=gl.getAttribLocation(gl.program,'a_Position');
gl.clearColor(0.0, 0.0, 0.0, 1.0);
gl.clear(gl.COLOR_BUFFER_BIT);

const g_points=[];
canvas.addEventListener('click',function(event){
  const {clientX,clientY}=event;
  const {left,top,width,height}=canvas.getBoundingClientRect();
  const [cssX,cssY]=[
    clientX-left,
    clientY-top
  ];
  const [halfWidth,halfHeight]=[width/2,height/2];
  const [xBaseCenter,yBaseCenter]=[cssX-halfWidth,cssY-halfHeight];
  const yBaseCenterTop=-yBaseCenter;
  const [x,y]=[xBaseCenter/halfWidth,yBaseCenterTop/halfHeight];
  g_points.push({x,y});
  gl.clear(gl.COLOR_BUFFER_BIT);
  g_points.forEach(({x,y})=>{
    gl.vertexAttrib2f(a_Position,x,y);
    gl.drawArrays(gl.POINTS, 0, 1);
  })

})

# webgl 同步绘图原理总结
webgl 的同步绘图的现象,其实是由webgl 底层内置的颜色缓冲区导致的。
在我们想要将图像显示出来的时候,那就照着颜色缓冲区中的图像去画,这个步骤是webgl 内部自动完成的,我们只要执行绘图命令即可。
颜色缓冲区中存储的图像,只在当前线程有效。比如我们先在js 主线程中绘图,主线程结束后,会再去执行信息队列里的异步线程。在执行异步线程时,颜色缓冲区就会被webgl 系统重置;
# 用js控制顶点尺寸
用js 控制顶点尺寸的方法和控制顶点位置的方法是一样
1.首先咱们还是要在着色器里暴露出一个可以控制顶点尺寸的attribute 变量。
<script id="vertexShader" type="x-shader/x-vertex">
    attribute vec4 a_Position;
    attribute float a_PointSize;
    void main(){
        gl_Position = a_Position;
        gl_PointSize = a_PointSize;
    }
</script>
上面的a_PointSize 是一个浮点类型的变量。
const a_PointSize=gl.getAttribLocation(gl.program,'a_PointSize');
3.修改attribute 变量
gl.vertexAttrib1f(a_PointSize,100.0);
整体代码:
<canvas id="canvas"></canvas>
<script id="vertexShader" type="x-shader/x-vertex">
    attribute vec4 a_Position;
    attribute float a_PointSize;
    void main(){
        gl_Position = a_Position;
        gl_PointSize = a_PointSize;
    }
</script>
<script id="fragmentShader" type="x-shader/x-fragment">
    void main() {
        gl_FragColor = vec4(1.0, 1.0, 0.0, 1.0);
    }
</script>
<script type="module">
    import {initShaders} from '../jsm/Utils.js';

    const canvas = document.getElementById('canvas');
    canvas.width=window.innerWidth;
    canvas.height=window.innerHeight;
    const gl = canvas.getContext('webgl');
    const vsSource = document.getElementById('vertexShader').innerText;
    const fsSource = document.getElementById('fragmentShader').innerText;
    initShaders(gl, vsSource, fsSource);
    const a_Position=gl.getAttribLocation(gl.program,'a_Position');
    const a_PointSize=gl.getAttribLocation(gl.program,'a_PointSize');
    gl.vertexAttrib3f(a_Position,0.0,0.0,0.0);
    gl.vertexAttrib1f(a_PointSize,100.0);
    gl.clearColor(0.0, 0.0, 0.0, 1.0);
    gl.clear(gl.COLOR_BUFFER_BIT);
    gl.drawArrays(gl.POINTS, 0, 1);
</script>
鼠标随机改变顶点大小:
const a_Position=gl.getAttribLocation(gl.program,'a_Position');
const a_PointSize=gl.getAttribLocation(gl.program,'a_PointSize');
gl.clearColor(0.0, 0.0, 0.0, 1.0);
gl.clear(gl.COLOR_BUFFER_BIT);
const g_points=[];
canvas.addEventListener('click',function(event){
  const {clientX,clientY}=event;
  const {left,top,width,height}=canvas.getBoundingClientRect();
  const [cssX,cssY]=[
    clientX-left,
    clientY-top
  ];
  const [halfWidth,halfHeight]=[width/2,height/2];
  const [xBaseCenter,yBaseCenter]=[cssX-halfWidth,cssY-halfHeight];
  const yBaseCenterTop=-yBaseCenter;
  const [x,y]=[xBaseCenter/halfWidth,yBaseCenterTop/halfHeight];
  g_points.push({x,y,z:Math.random()*50});
  gl.clear(gl.COLOR_BUFFER_BIT);
  g_points.forEach(({x,y,z})=>{
    gl.vertexAttrib2f(a_Position,x,y);
    gl.vertexAttrib1f(a_PointSize,z);
    gl.drawArrays(gl.POINTS, 0, 1);
  })
})
# 用js 控制顶点的颜色
首先我们要知道,限定颜色变量的限定符叫uniform。
# 1-用js 控制顶点颜色的步骤
<script id='fragmentShader' type='x-shader/x-fragment'>
  precision mediump float;
  uniform vec4 u_FragColor;
  void main(){
    gl_FragColor = u_FragColor;
  }
</script>
上面的uniform 就是咱们刚才说过的限定符,vec4 是4维的变量类型,u_FragColor 就是变量名。
第一行的precision mediump float 是对浮点数精度的定义,mediump 是中等精度的意思,这个必须要有,不然画不出东西来。
2.在js 中获取片元着色器暴露出的uniform 变量
const u_FragColor=gl.getUniformLocation(gl.program,'u_FragColor');
getUniformLocation() 方法就是用于获取片元着色器暴露出的uniform 变量的,其第一个参数是程序对象,第二个参数是变量名。
3.修改uniform 变量
gl.uniform4f(u_FragColor,1.0,1.0,0.0,1.0);
整体代码
<script id="vertexShader" type="x-shader/x-vertex">
    attribute vec4 a_Position;
    attribute float a_PointSize;
    void main(){
        gl_Position = a_Position;
        gl_PointSize = a_PointSize;
    }
</script>
<script id="fragmentShader" type="x-shader/x-fragment">
    precision mediump float;
    uniform vec4 u_FragColor;
    void main() {
        gl_FragColor = u_FragColor;
    }
</script>
<script type="module">
    import {initShaders} from '../jsm/Utils.js';

    const canvas = document.getElementById('canvas');
    canvas.width=window.innerWidth;
    canvas.height=window.innerHeight;
    const gl = canvas.getContext('webgl');
    const vsSource = document.getElementById('vertexShader').innerText;
    const fsSource = document.getElementById('fragmentShader').innerText;
    initShaders(gl, vsSource, fsSource);
    const a_Position=gl.getAttribLocation(gl.program,'a_Position');
    const a_PointSize=gl.getAttribLocation(gl.program,'a_PointSize');
    const u_FragColor=gl.getUniformLocation(gl.program,'u_FragColor');
    gl.vertexAttrib3f(a_Position,0.0,0.0,0.0);
    gl.vertexAttrib1f(a_PointSize,100.0);
    gl.uniform4f(u_FragColor,1.0,1.0,0.0,1.0);
    gl.clearColor(0.0, 0.0, 0.0, 1.0);
    gl.clear(gl.COLOR_BUFFER_BIT);
    gl.drawArrays(gl.POINTS, 0, 1);
</script>
鼠标随机改变顶点的颜色。
<script type="module">
    import {initShaders} from '../jsm/Utils.js';

    const canvas = document.getElementById('canvas');
    canvas.width=window.innerWidth;
    canvas.height=window.innerHeight;
    const gl = canvas.getContext('webgl');
    const vsSource = document.getElementById('vertexShader').innerText;
    const fsSource = document.getElementById('fragmentShader').innerText;
    initShaders(gl, vsSource, fsSource);
    const a_Position=gl.getAttribLocation(gl.program,'a_Position');
    const a_PointSize=gl.getAttribLocation(gl.program,'a_PointSize');
    const u_FragColor=gl.getUniformLocation(gl.program,'u_FragColor');
    gl.clearColor(0.0, 0.0, 0.0, 1.0);
    gl.clear(gl.COLOR_BUFFER_BIT);

    const arr=[];
    canvas.addEventListener('click',function(event){
        const {clientX,clientY}=event;
        const {left,top,width,height}=canvas.getBoundingClientRect();
        const [cssX,cssY]=[
            clientX-left,
            clientY-top
        ];
        const [halfWidth,halfHeight]=[width/2,height/2];
        const [xBaseCenter,yBaseCenter]=[cssX-halfWidth,cssY-halfHeight];
        const yBaseCenterTop=-yBaseCenter;
        const [x,y]=[xBaseCenter/halfWidth,yBaseCenterTop/halfHeight];
        const color=new Float32Array([
            Math.random(),
            Math.random(),
            Math.random(),
            1.0
        ])
        arr.push({x,y,z:Math.random()*50,color});
        gl.clear(gl.COLOR_BUFFER_BIT);
        arr.forEach(({x,y,z,color})=>{
            gl.vertexAttrib2f(a_Position,x,y);
            gl.vertexAttrib1f(a_PointSize,z);
            gl.uniform4fv(u_FragColor,color);
            gl.drawArrays(gl.POINTS, 0, 1);
        })
    })
</script>
# 2-uniform4fv() 方法
我们在改变uniform 变量的时候,既可以用uniform4f() 方法一个个的写参数,也可以用uniform4fv() 方法传递类型数组。
- uniform4f 中,4 是有4个数据,f 是float 浮点类型,在我们上面的例子里就是r、g、b、a 这四个颜色数据。
- uniform4fv 中,4f 的意思和上面一样,v 是vector 矢量的意思,这在数学里就是向量的意思。由之前的4f 可知,这个向量由4个浮点类型的分量构成。
gl.uniform4f(u_FragColor,1.0,1.0,0.0,1.0);
//等同于
const color=new Float32Array([1.0,1.0,0.0,1.0]);
gl.uniform4fv(u_FragColor,color);
uniform4f() 和uniform4fv() 也有着自己的同族方法,其中的4 可以变成1|2|3。
uniform4fv() 方法的第二个参数必须是Float32Array 数组,不要使用普通的Array 对象。
Float32Array 是一种32 位的浮点型数组,它在浏览器中的运行效率要比普通的Array 高很多。
# 案例-用鼠标绘制星空
# 1-用鼠标绘制圆形的顶点
<script id='fragmentShader' type='x-shader/x-fragment'>
    precision mediump float;
    uniform vec4 u_FragColor;
    void main() {
        float dist = distance(gl_PointCoord, vec2(0.5, 0.5));
        if(dist < 0.5) {
            gl_FragColor = u_FragColor;
        } else {
            discard;
        }
    }
</script>
- distance(p1,p2) 计算两个点位的距离
- gl_PointCoord 片元在一个点中的位置,此位置是被归一化的
- discard 丢弃,即不会一个片元进行渲染
着色器语法参考地址:https://www.khronos.org/registry/OpenGL-Refpages/gl4/
# 2-绘制随机透明度的星星
首先我们可以先给canvas 一个星空背景
#canvas {
    background: url("./images/sky.jpg");
    background-size: cover;
    background-position: right bottom;
}
刷底色的时候给一个透明的底色,这样才能看见canvas的css背景
gl.clearColor(0, 0, 0, 0);
接下来图形的透明度作为变量:
const arr = new Float32Array([0.87, 0.91, 1, a]);
gl.uniform4fv(u_FragColor, arr);
开启片元的颜色合成功能
gl.enable(gl.BLEND)
设置片元的合成方式
gl.blendFunc(gl.SRC_ALPHA, gl.ONE_MINUS_SRC_ALPHA)
# 3-制作闪烁的繁星
# 3-1-建立补间动画的意识
AE,因为它可以让你对动画的运行原理和架构方式有一个具象的认知。
AE里画一颗星星,加几个关键帧,让它眨一下眼睛。

在这里会涉及以下概念:
- 合成:多个时间轨的集合
- 时间轨:通过关键帧,对其中目标对象的状态进行插值计算
- 补间动画:通过两个关键帧,对一个对象在这两个关键帧之间的状态进行插值计算,从而实现这个对象在两个关键帧间的平滑过渡
# 3-2-架构代码
1.建立合成对象
export default class Compose{
  constructor(){
    this.parent = null;
    this.children = [];
  }
  add(obj){
    obj.parent = this;
    this.children.push(obj);
  }
  update(t){
    this.children.forEach((e)=>{
      e.update(t);
    })
  }
}
属性
- parent 父对象,合成对象可以相互嵌套
- children 子对象集合,其集合元素可以是时间轨,也可以是合成对象
方法:
- add(obj) 添加子对象方法
- update(t) 基于当前时间更新子对象状态的方法
2.建立时间轨
export default class Track{
  constructor(target){
    this.target = target;
    this.parent = null;
    this.start=0;
    this.timeLen = 5;
    this.loop=false
    this.keyMap=new Map()
  }
  update(t){
        const {keyMap,timeLen,target,loop}=this
        let time=t-this.start
        if(loop){
            time=time%timeLen
        }
        for(const [key,fms] of keyMap.entries()){
            const last=fms.length-1
            if(time<fms[0][0]){
                target[key]=fms[0][1]
            }else if(time>fms[last][0]){
                target[key]=fms[last][1]
            }else{
                target[key]=getValBetweenFms(time,fms,last)
            }
        }
    }
}
属性
- target 时间轨上的目标对象
- parent 父对象,只能是合成对象
- start 起始时间,即时间轨的建立时间
- timeLen 时间轨总时长
- loop 是否循环
- keyMap 关键帧集合,结构如下:
[
	[
		'对象属性1',
		[
			[时间1,属性值], //关键帧
			[时间2,属性值], //关键帧
		]
	],
	[
		'对象属性2',
		[
			[时间1,属性值], //关键帧
			[时间2,属性值], //关键帧
		]
	],
]
方法
update(t) 基于当前时间更新目标对象的状态。
先计算本地时间,即世界时间相对于时间轨起始时间的的时间。
若时间轨循环播放,则本地时间基于时间轨长度取余。
遍历关键帧集合:
- 若本地时间小于第一个关键帧的时间,目标对象的状态等于第一个关键帧的状态
- 若本地时间大于最后一个关键帧的时间,目标对象的状态等于最后一个关键帧的状态
- 否则,计算本地时间在左右两个关键帧之间对应的补间状态
3.获取两个关键帧之间补间状态的方法
线性公式:b = y-x*k;
function getValBetweenFms(time,fms,last){
    for(let i=0;i<last;i++){
        const fm1=fms[i]
        const fm2=fms[i+1]
        if(time>=fm1[0]&&time<=fm2[0]){
            const delta={
                x:fm2[0]-fm1[0],
                y:fm2[1]-fm1[1],
            }
            const k=delta.y/delta.x
            const b=fm1[1]-fm1[0]*k
            return k*time+b
        }
    }
}
getValBetweenFms(time,fms,last)
- time 本地时间
- fms 某个属性的关键帧集合
- last 最后一个关键帧的索引位置
其实现思路如下:
- 遍历所有关键帧
- 判断当前时间在哪两个关键帧之间
- 基于这两个关键帧的时间和状态,求点斜式
- 基于点斜式求本地时间对应的状态
# 3-3-使用合成对象和轨道对象制作补间动画
- 建立动画相关的对象
const compose=new Compose()
const stars=[]
canvas.addEventListener('click',function(event){
    const {x,y}=getPosByMouse(event,canvas)
    const a=1
    const s=Math.random()*5+2
    const obj={x,y,s,a}
    stars.push(obj)

    const track=new Track(obj)
    track.start=new Date()
    track.keyMap=new Map([
        ['a',[
            [500,a],
            [1000,0],
            [1500,a],
        ]]
    ])
    track.timeLen=2000
    track.loop=true
    compose.add(track)
})
- compose 合成对象的实例化
- stars 存储顶店数据的集合
- track 时间轨道对象的实例化
2.用请求动画帧驱动动画,连续更新数据,渲染视图。
!(function ani(){
    compose.update(new Date())
    render()
    requestAnimationFrame(ani)
})()
渲染方法如下:
function render(){
    gl.clear(gl.COLOR_BUFFER_BIT);
    stars.forEach(({x,y,s,a})=>{
        gl.vertexAttrib2f(a_Position,x,y);
        gl.vertexAttrib1f(a_PointSize,s);
        gl.uniform4fv(u_FragColor,new Float32Array([0.87,0.92,1,a]));
        gl.drawArrays(gl.POINTS, 0, 1);
    })
}
# 总结
学习了js 与着色器间的数据传输,从而去动态控制顶点的位置、大小和颜色,这是webgl 绘图的基础